
One of the reasons we founded Focus on Good two years ago was simple: we saw many small to midsize nonprofit organizations using unnecessarily bad photos to tell their stories. Hazy, poorly composed and underexposed images that failed to do justice to the important work they were doing.
They were likely using smartphones, but the problem wasn’t necessarily the devices themselves. Modern phones are more than capable of capturing high-quality images and videos. The real issue was how they were being used.
Here are some practical tips to help you get the most out of your smartphone.
Change Your Default Camera Settings
Cellphone cameras come with default settings that limit image quality in favor of smaller digital files, taking up less storage but producing lower-quality images and videos.
We think the following camera settings strike the right balance between image quality and storage usage.
While your cellphone menu may differ slightly from ours, navigate your way through your Settings/Camera Settings menu and check that you are using the following settings.
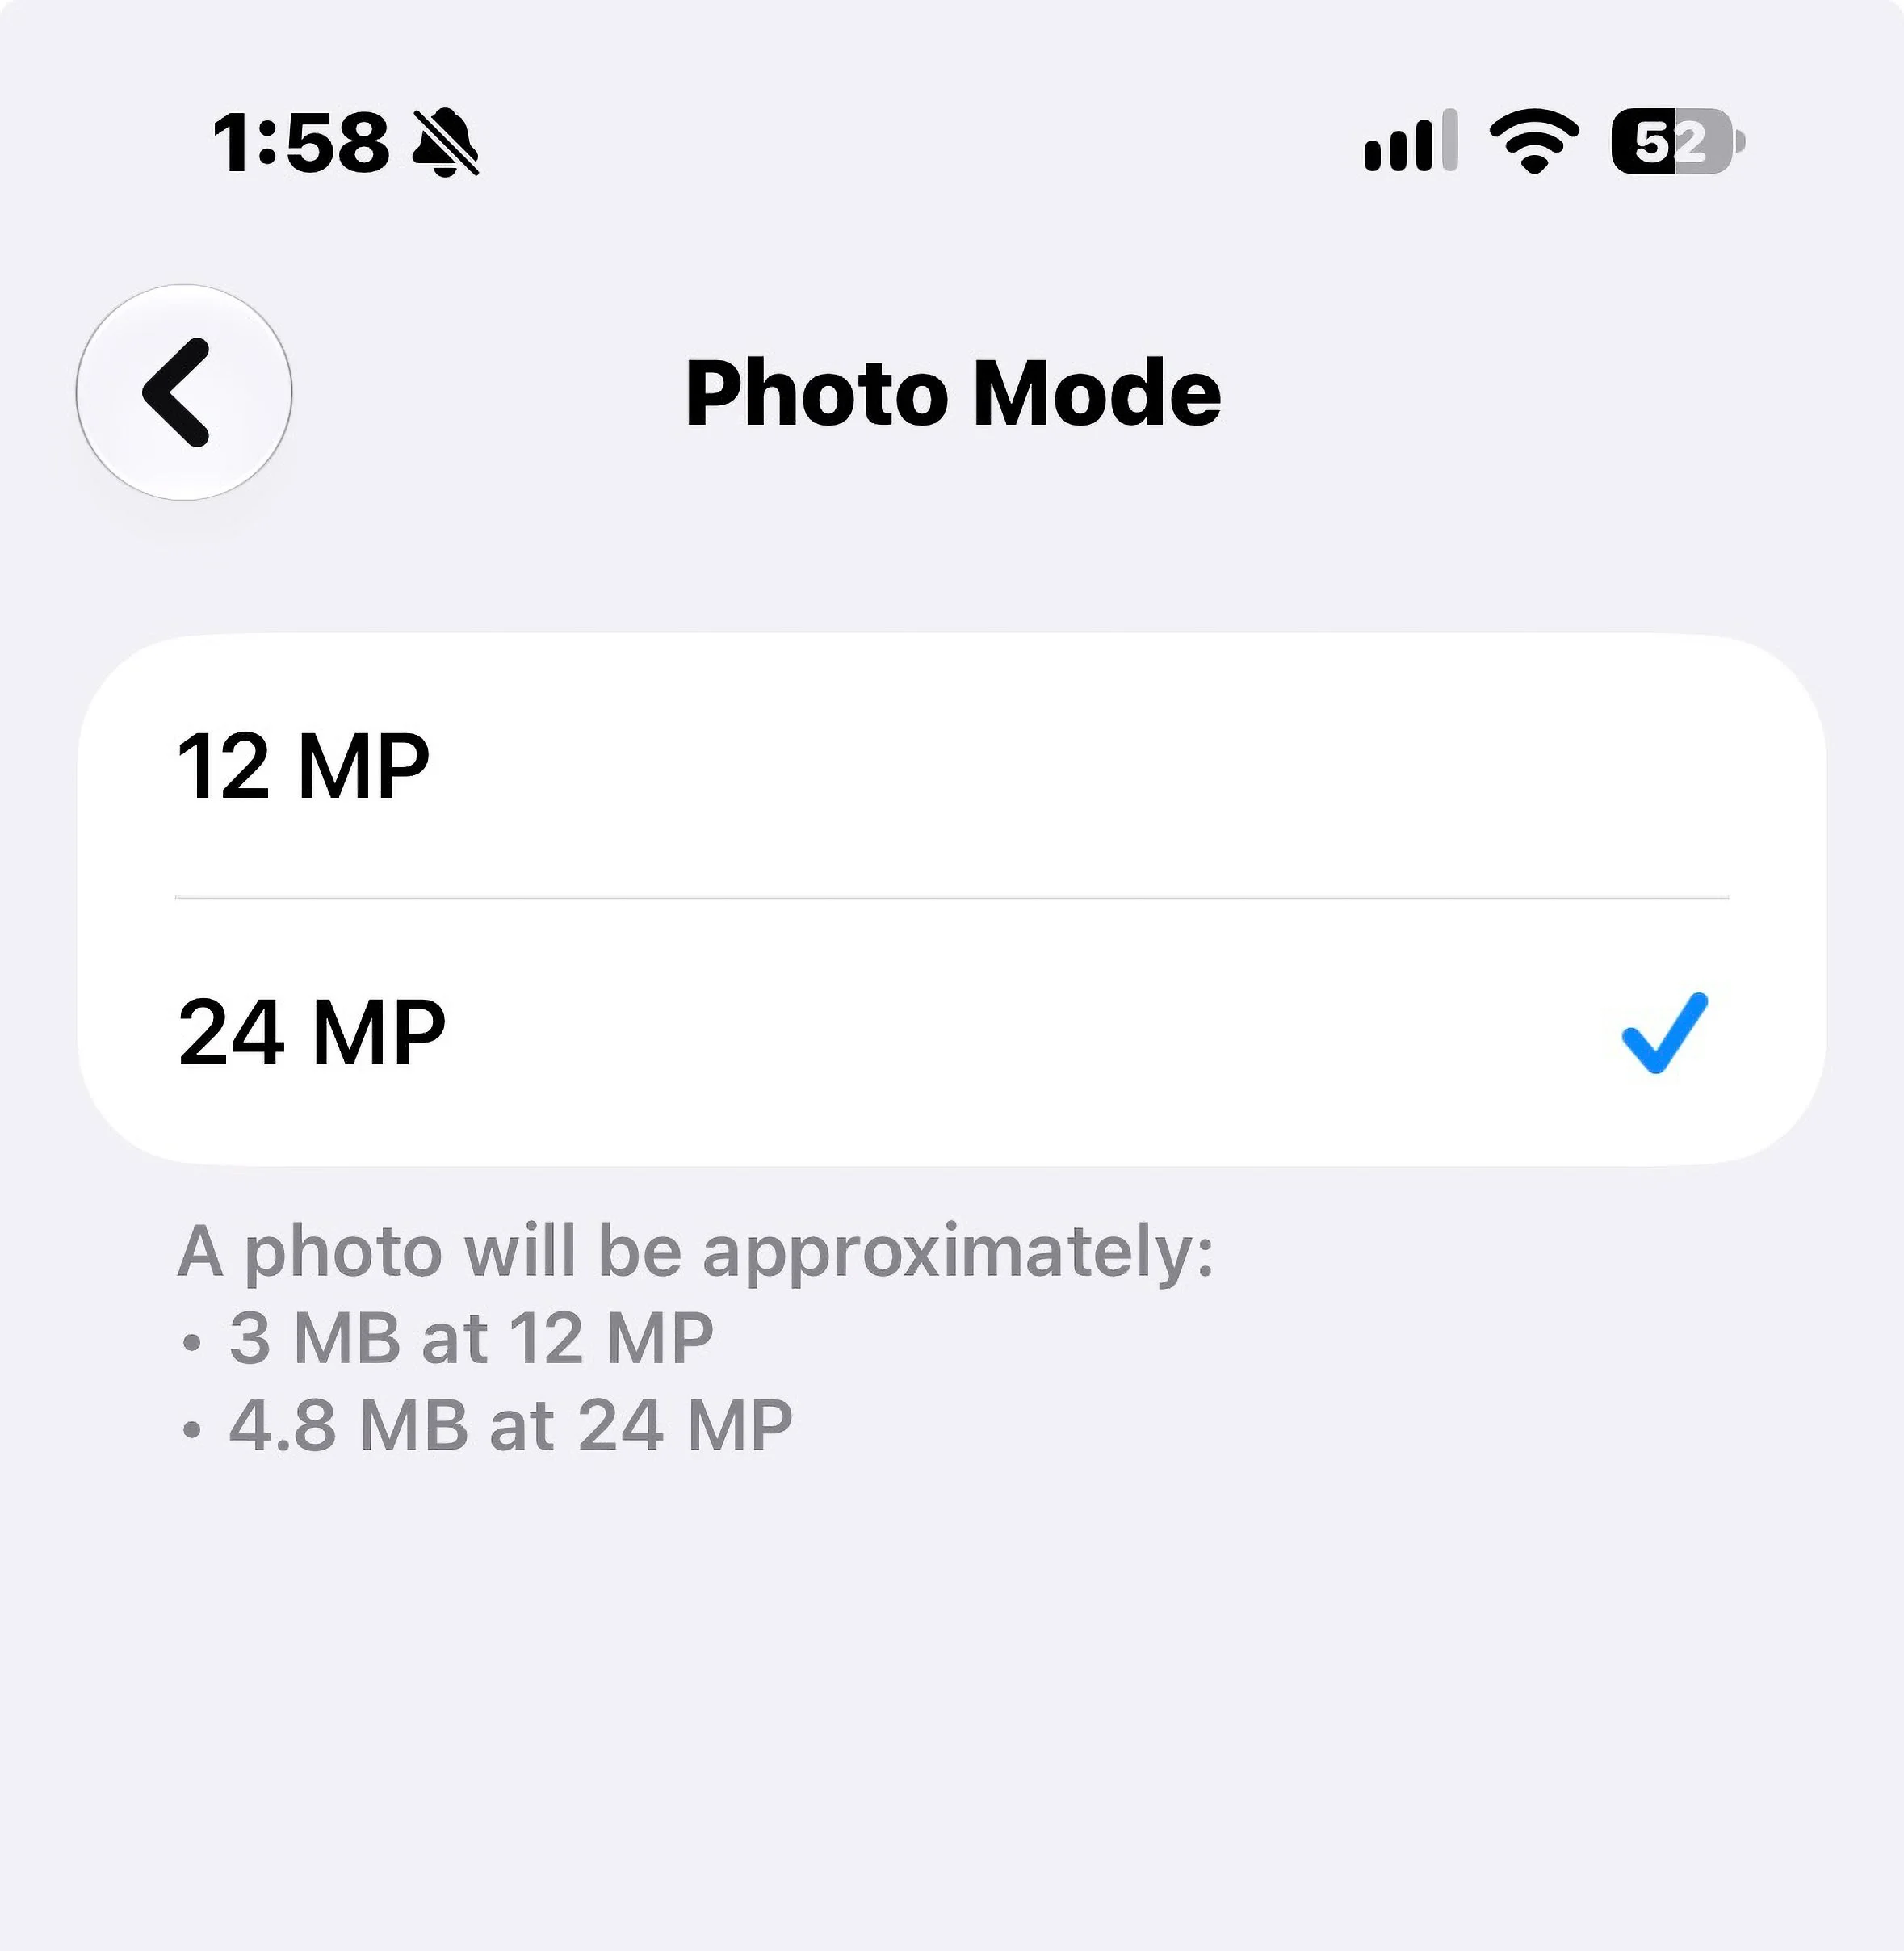
For photos, choose the highest level megapixel (MP) setting available, up to about 50 MP. Beyond that is overkill for social media purposes but higher levels may be justified if you plan to print the images.
If given a choice, choose JPEG over RAW to conserve storage space. If storage space is not an issue, choose RAW.
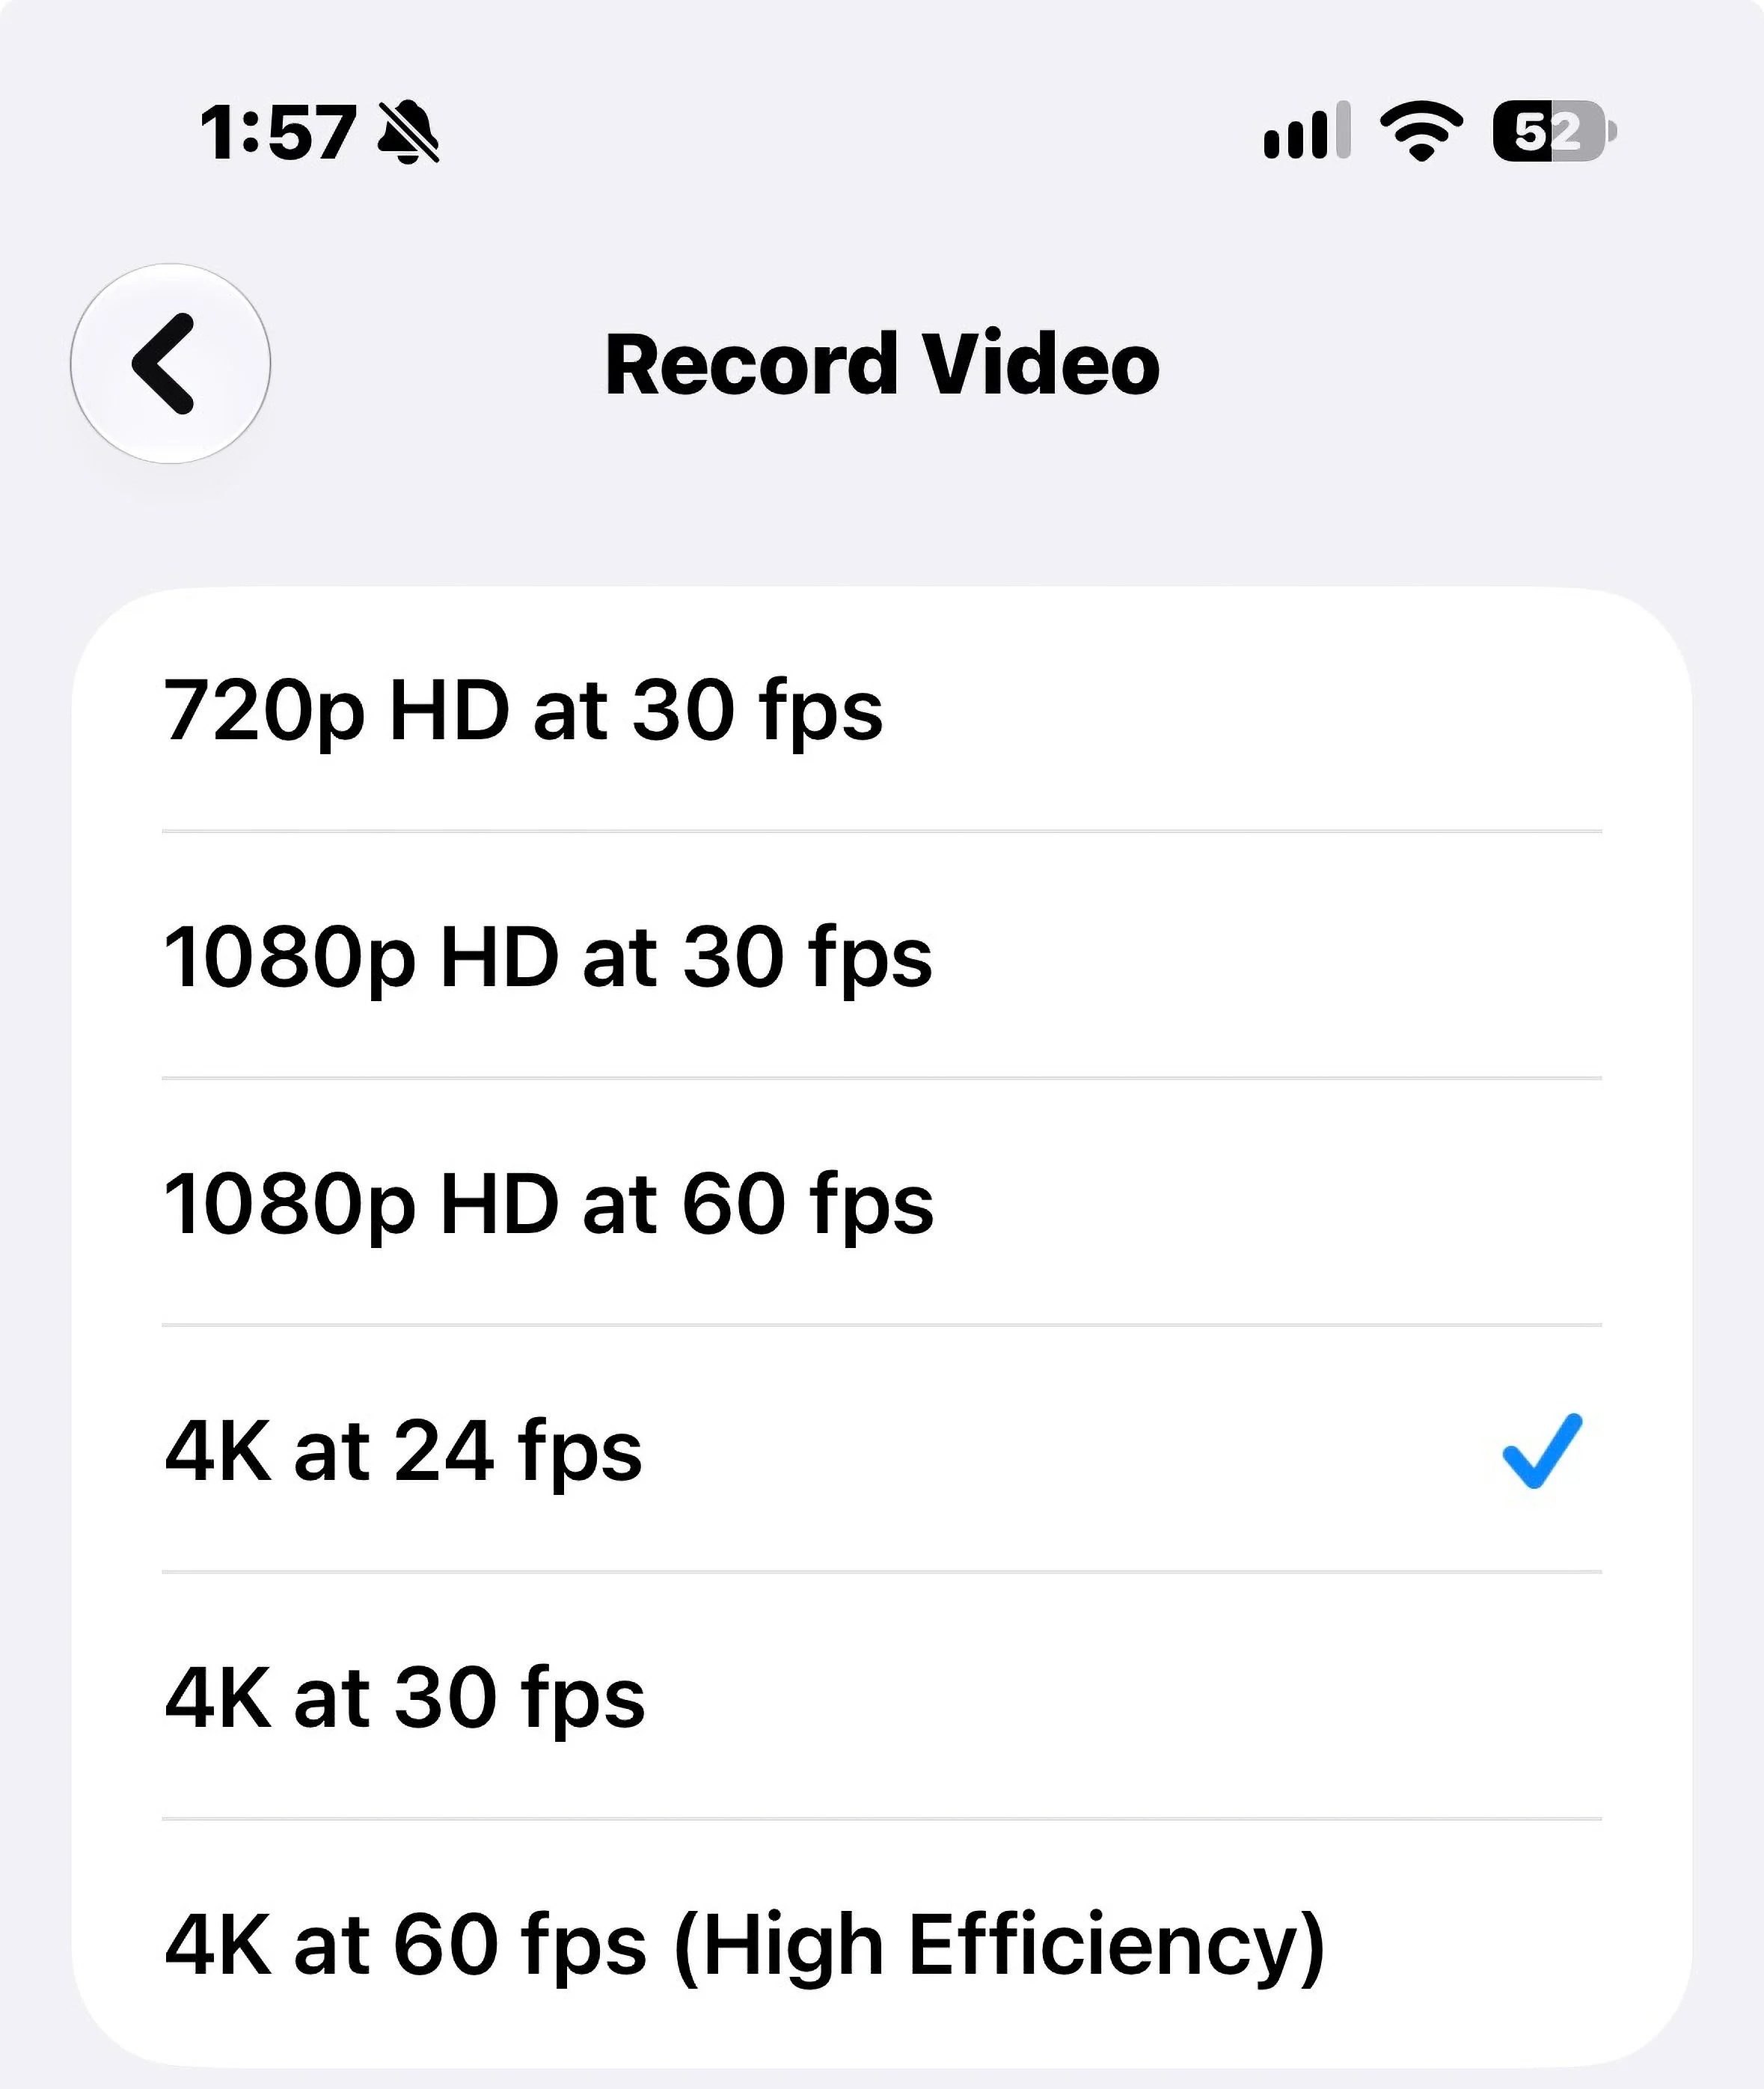
For video, choose 4K at 24 fps (frames per second).
Do not choose ProRes on iPhones or similar RAW formats on other cellphones, as it will use up too much storage unnecessarily.
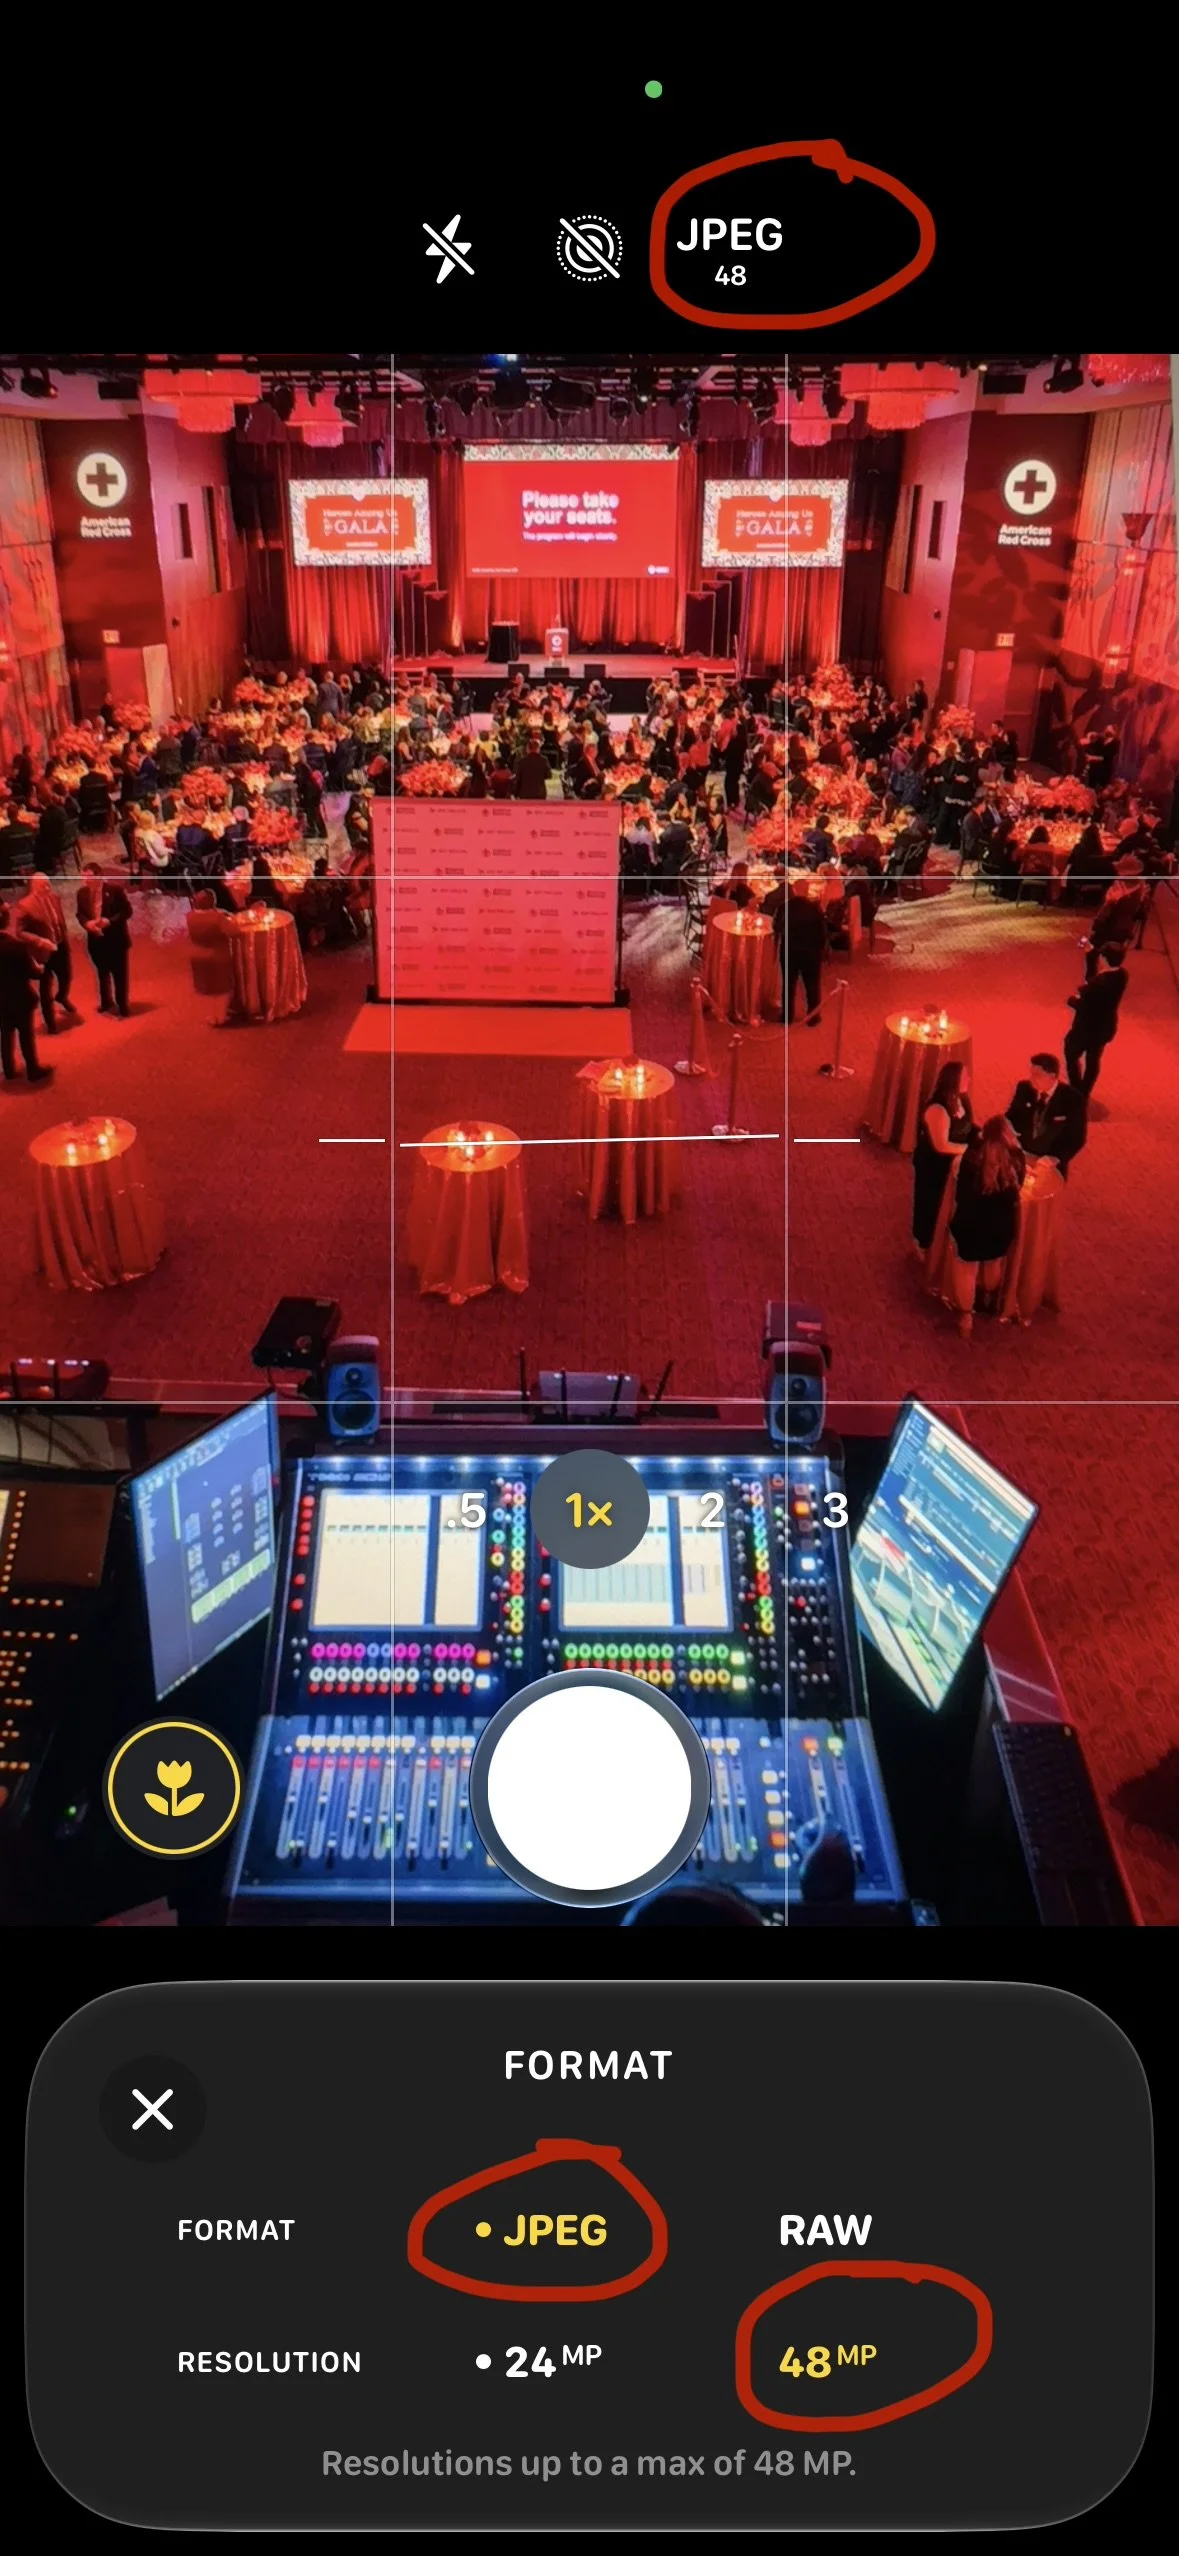
Some smartphones will also allow you to change your settings on the fly through the camera app without having to navigate through your settings menu again, as shown in this screenshot. There are similar options for changing video settings.
Light Their Faces
When photographing people, position your camera and subjects so their faces are well-lit.
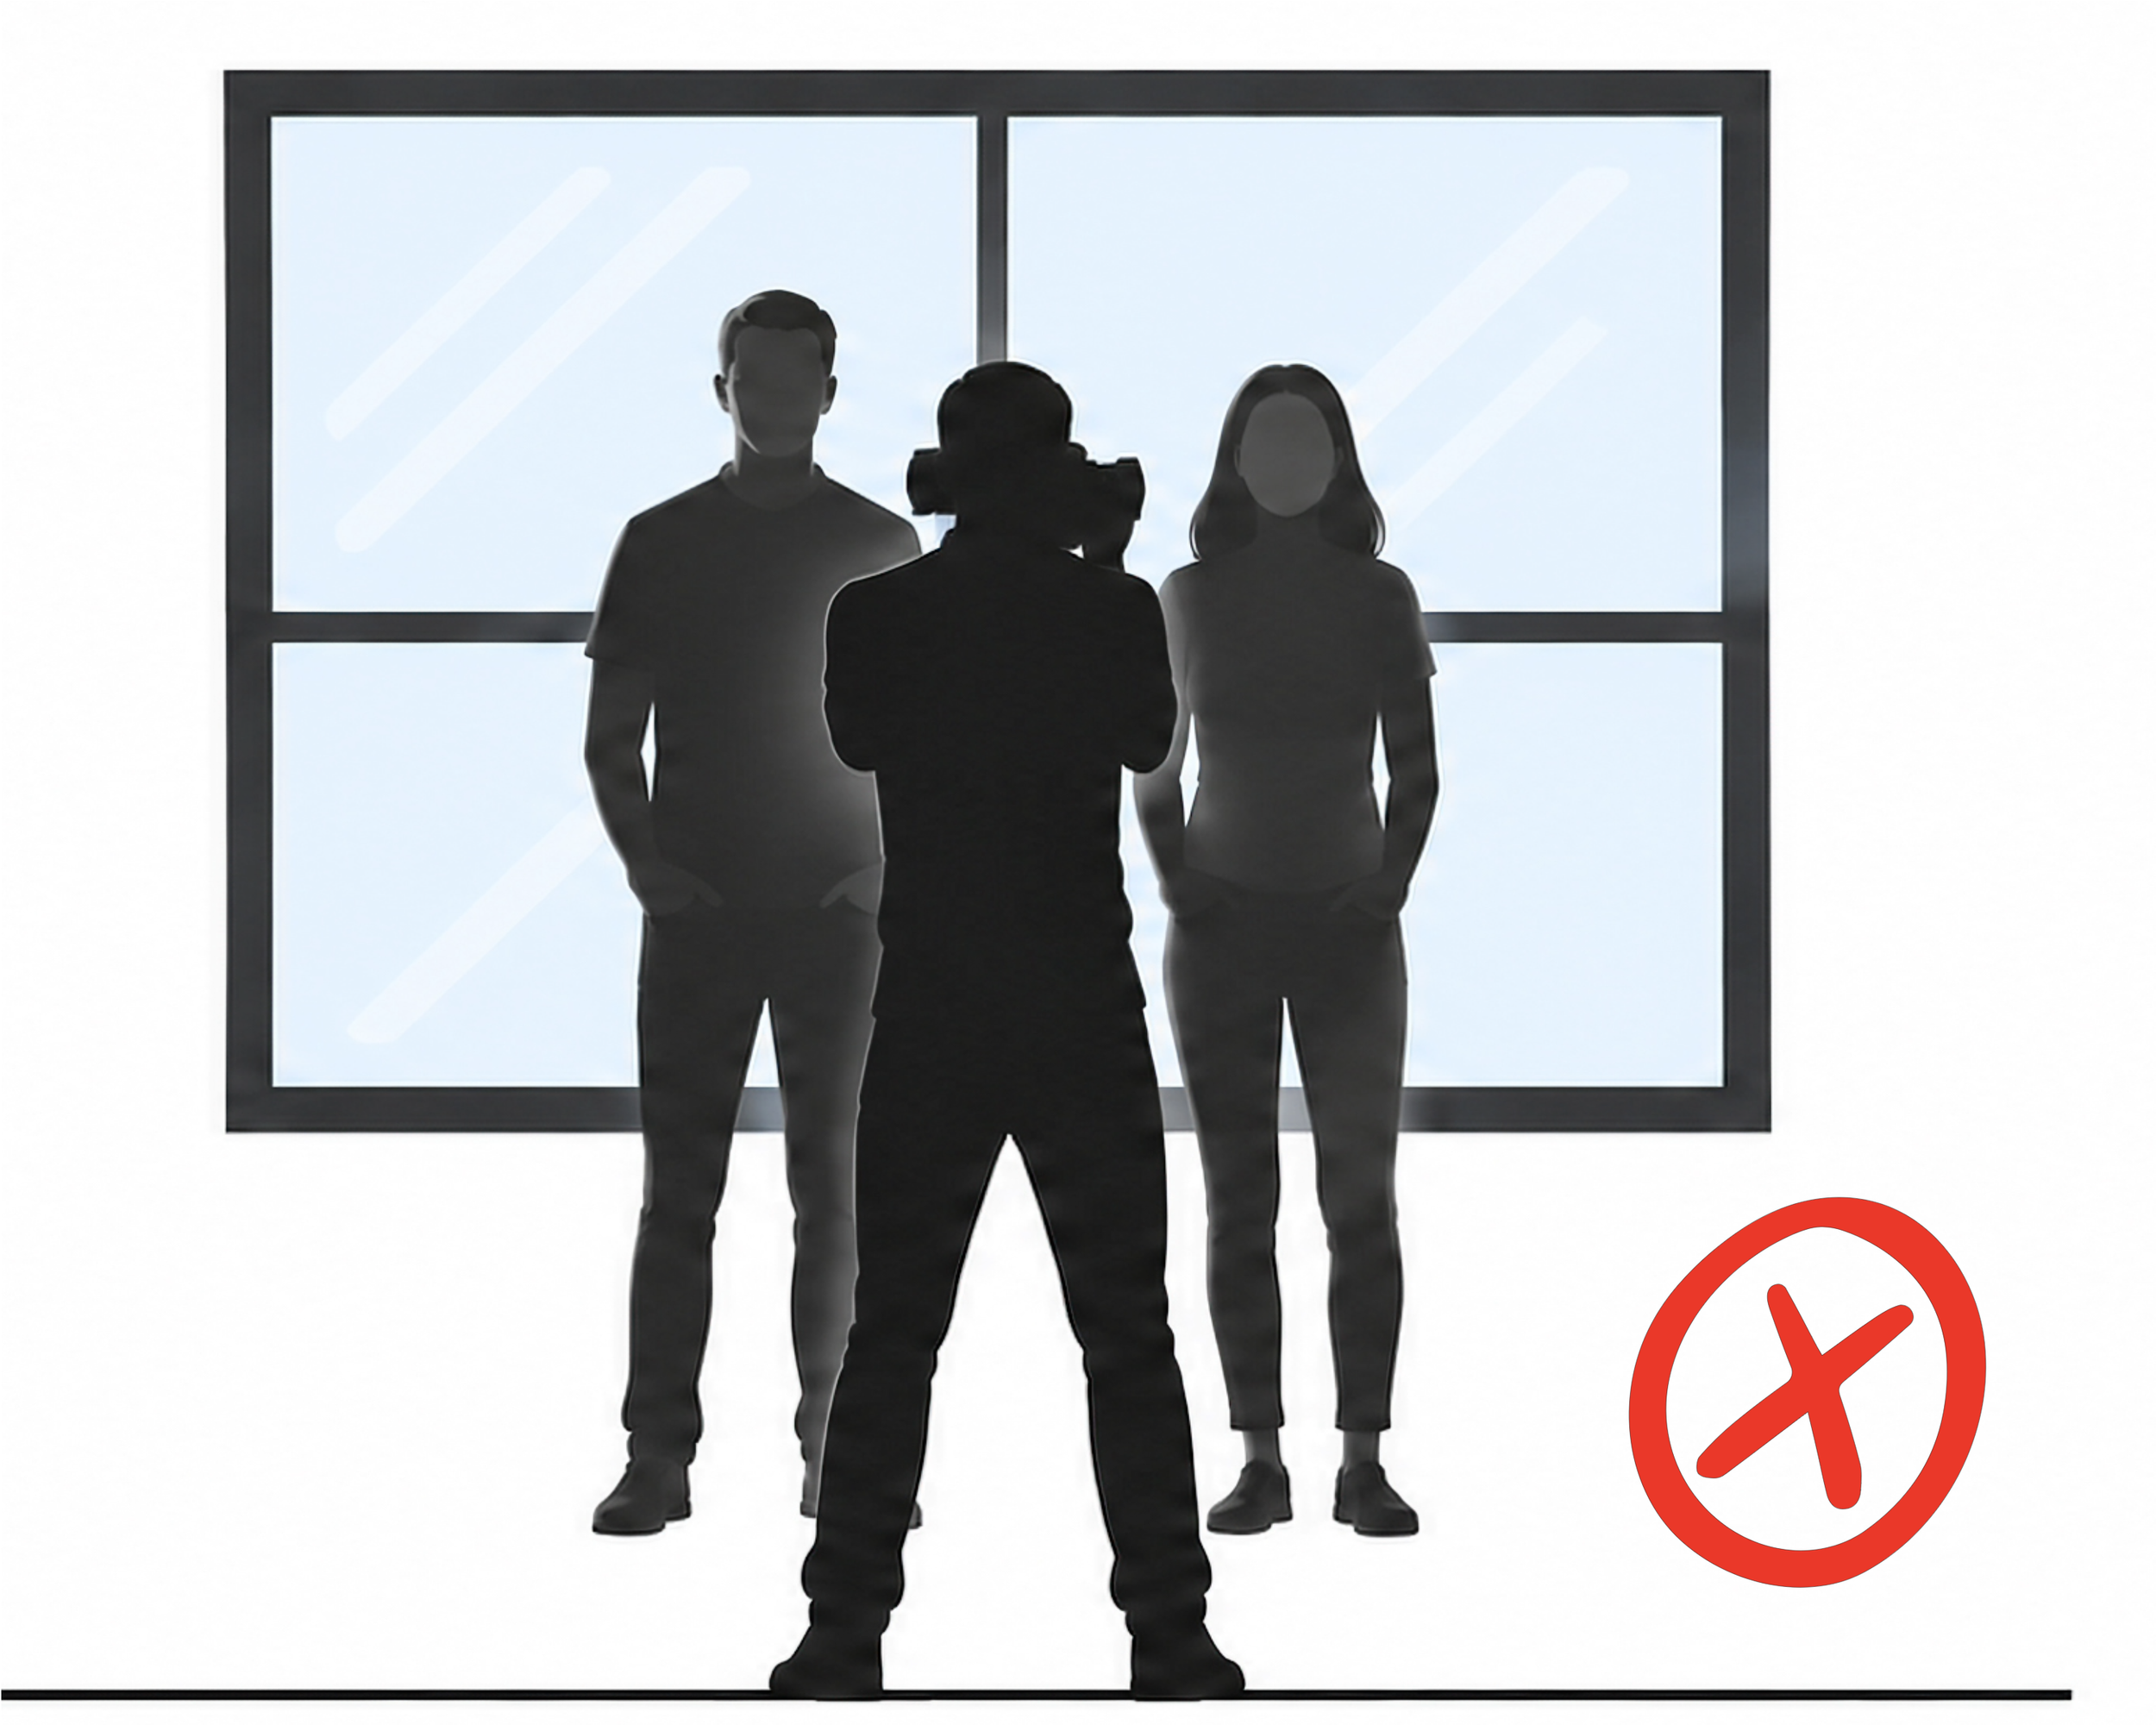
If you are in an environment with uneven lighting, make sure the brightest light is not coming from behind your subjects (such as a from a window), leaving their faces in darkness. Some smartphones are smart enough to compensate for this exact situation, but it is best to avoid it.
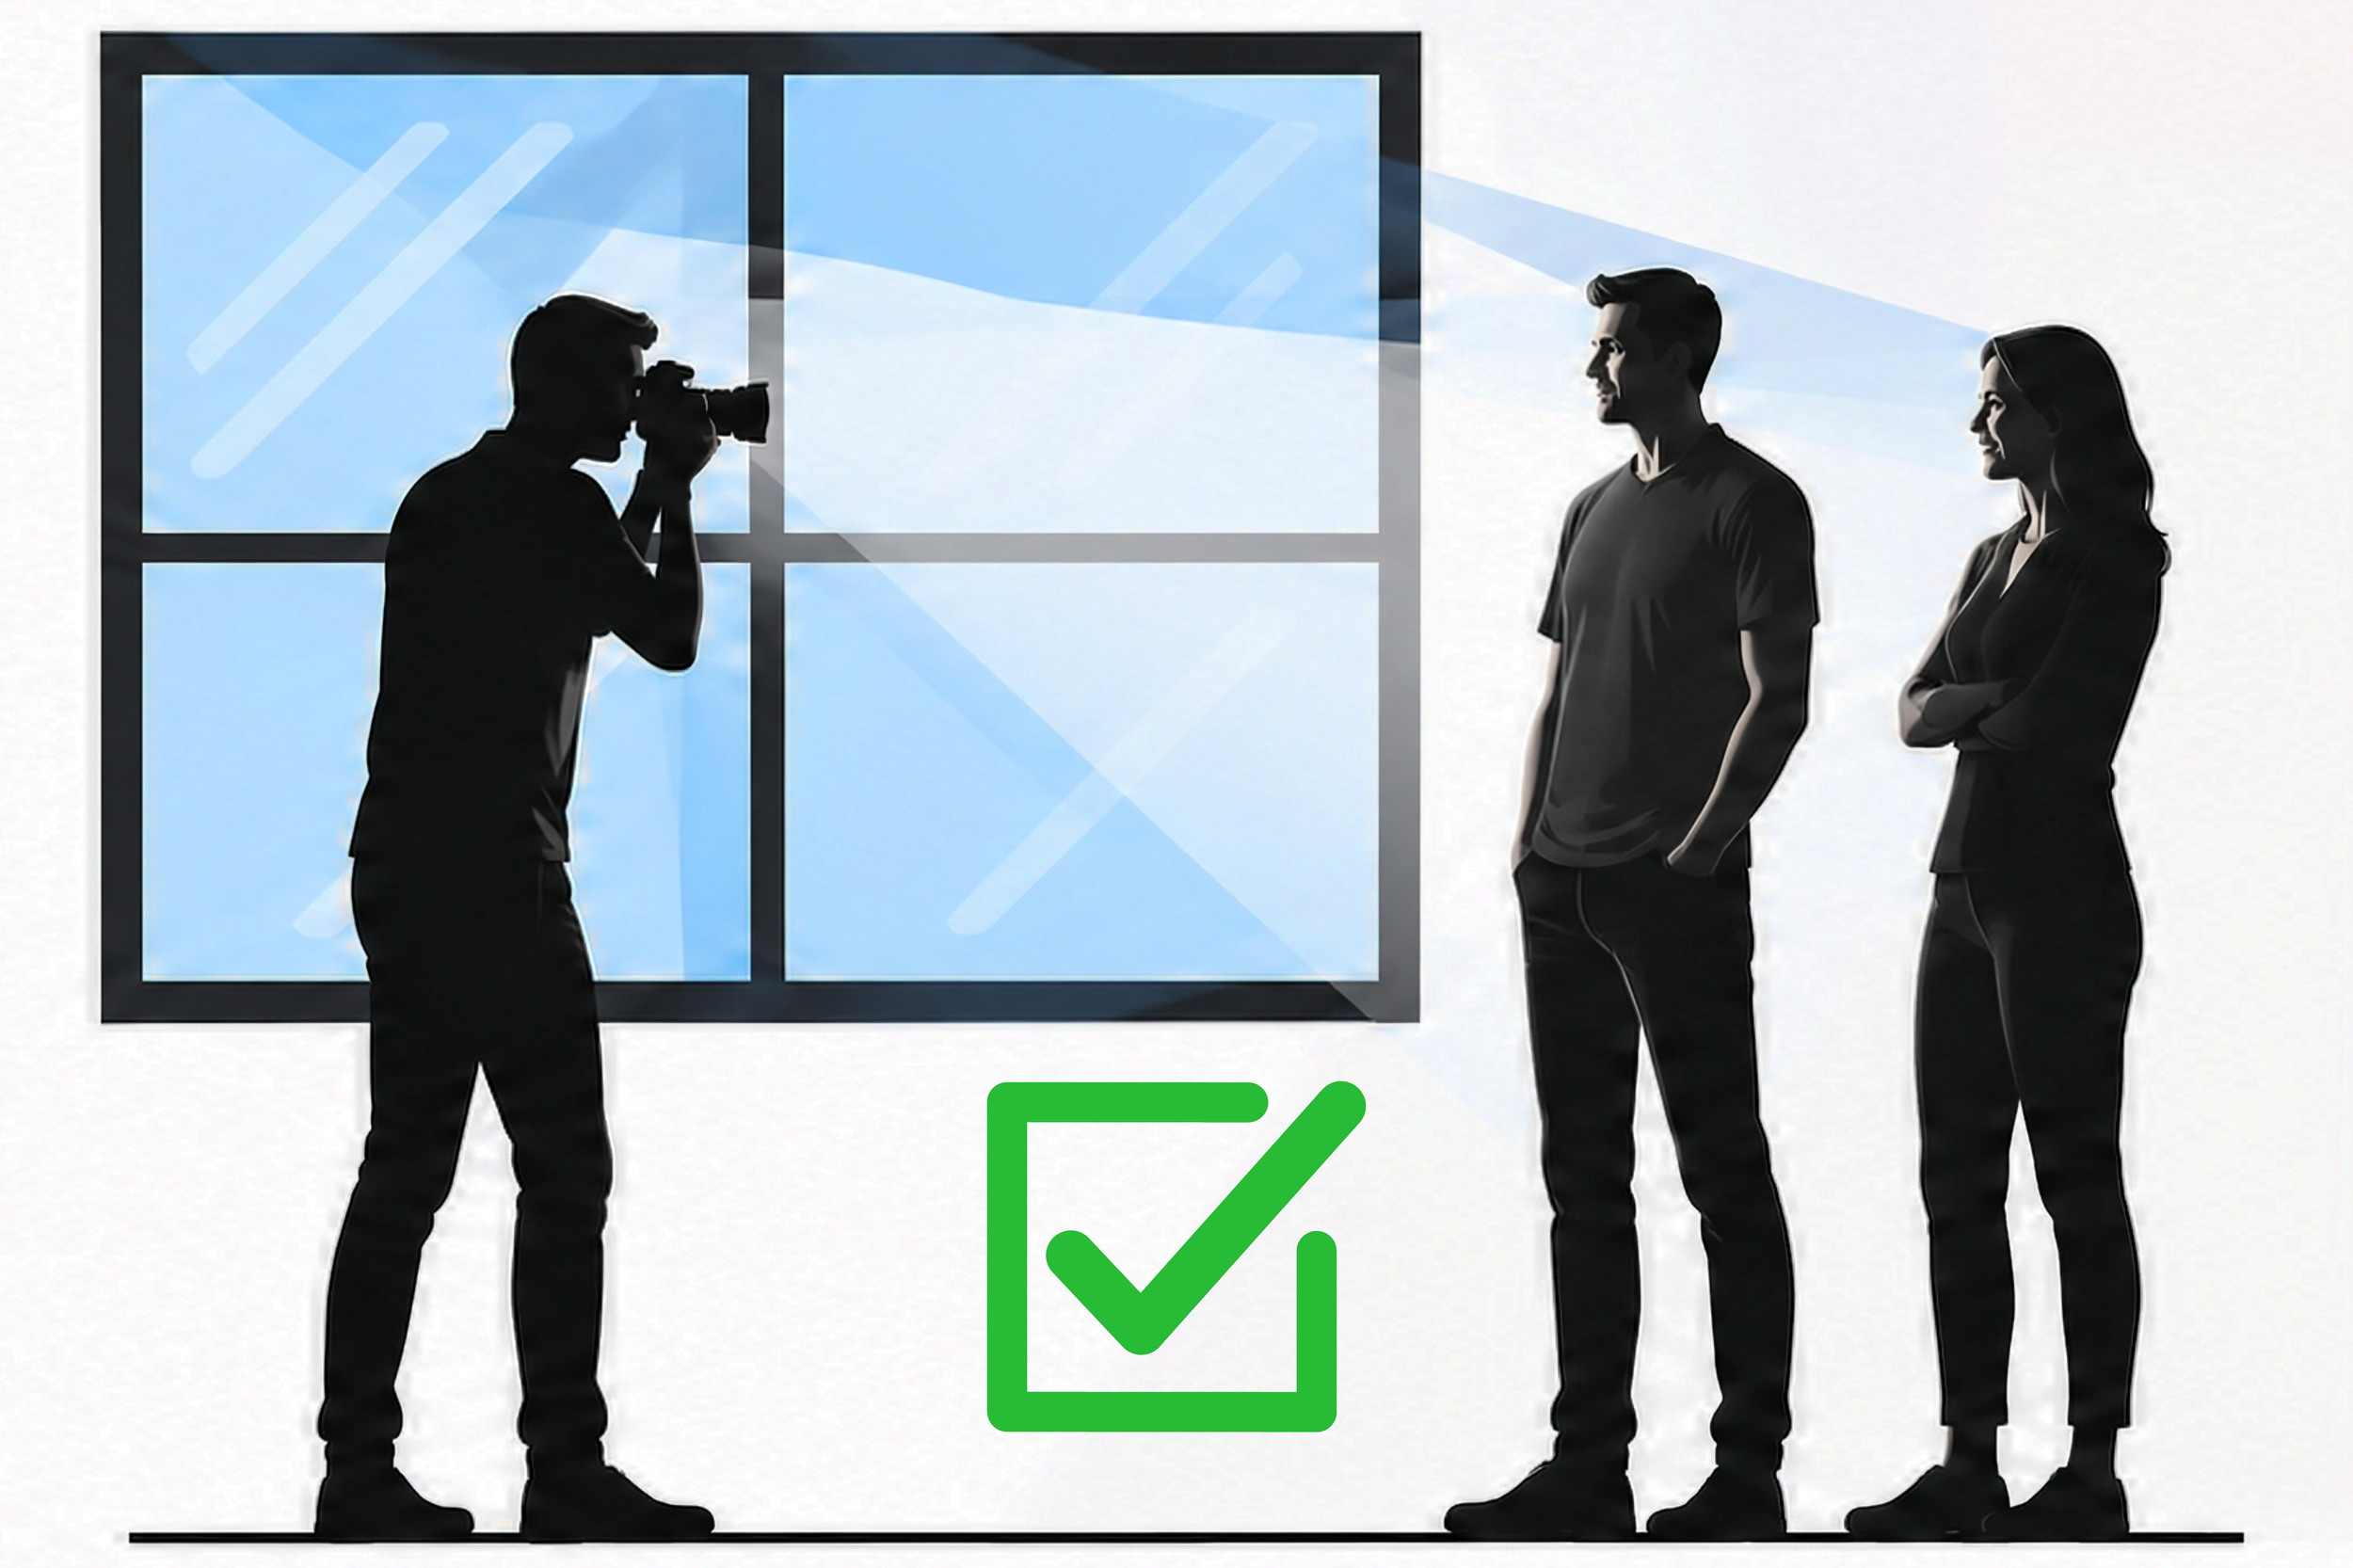
Instead, switch places with your subjects or have them move to the side so that their faces are illuminated by the source of the bright light.
Choose the Best Composition
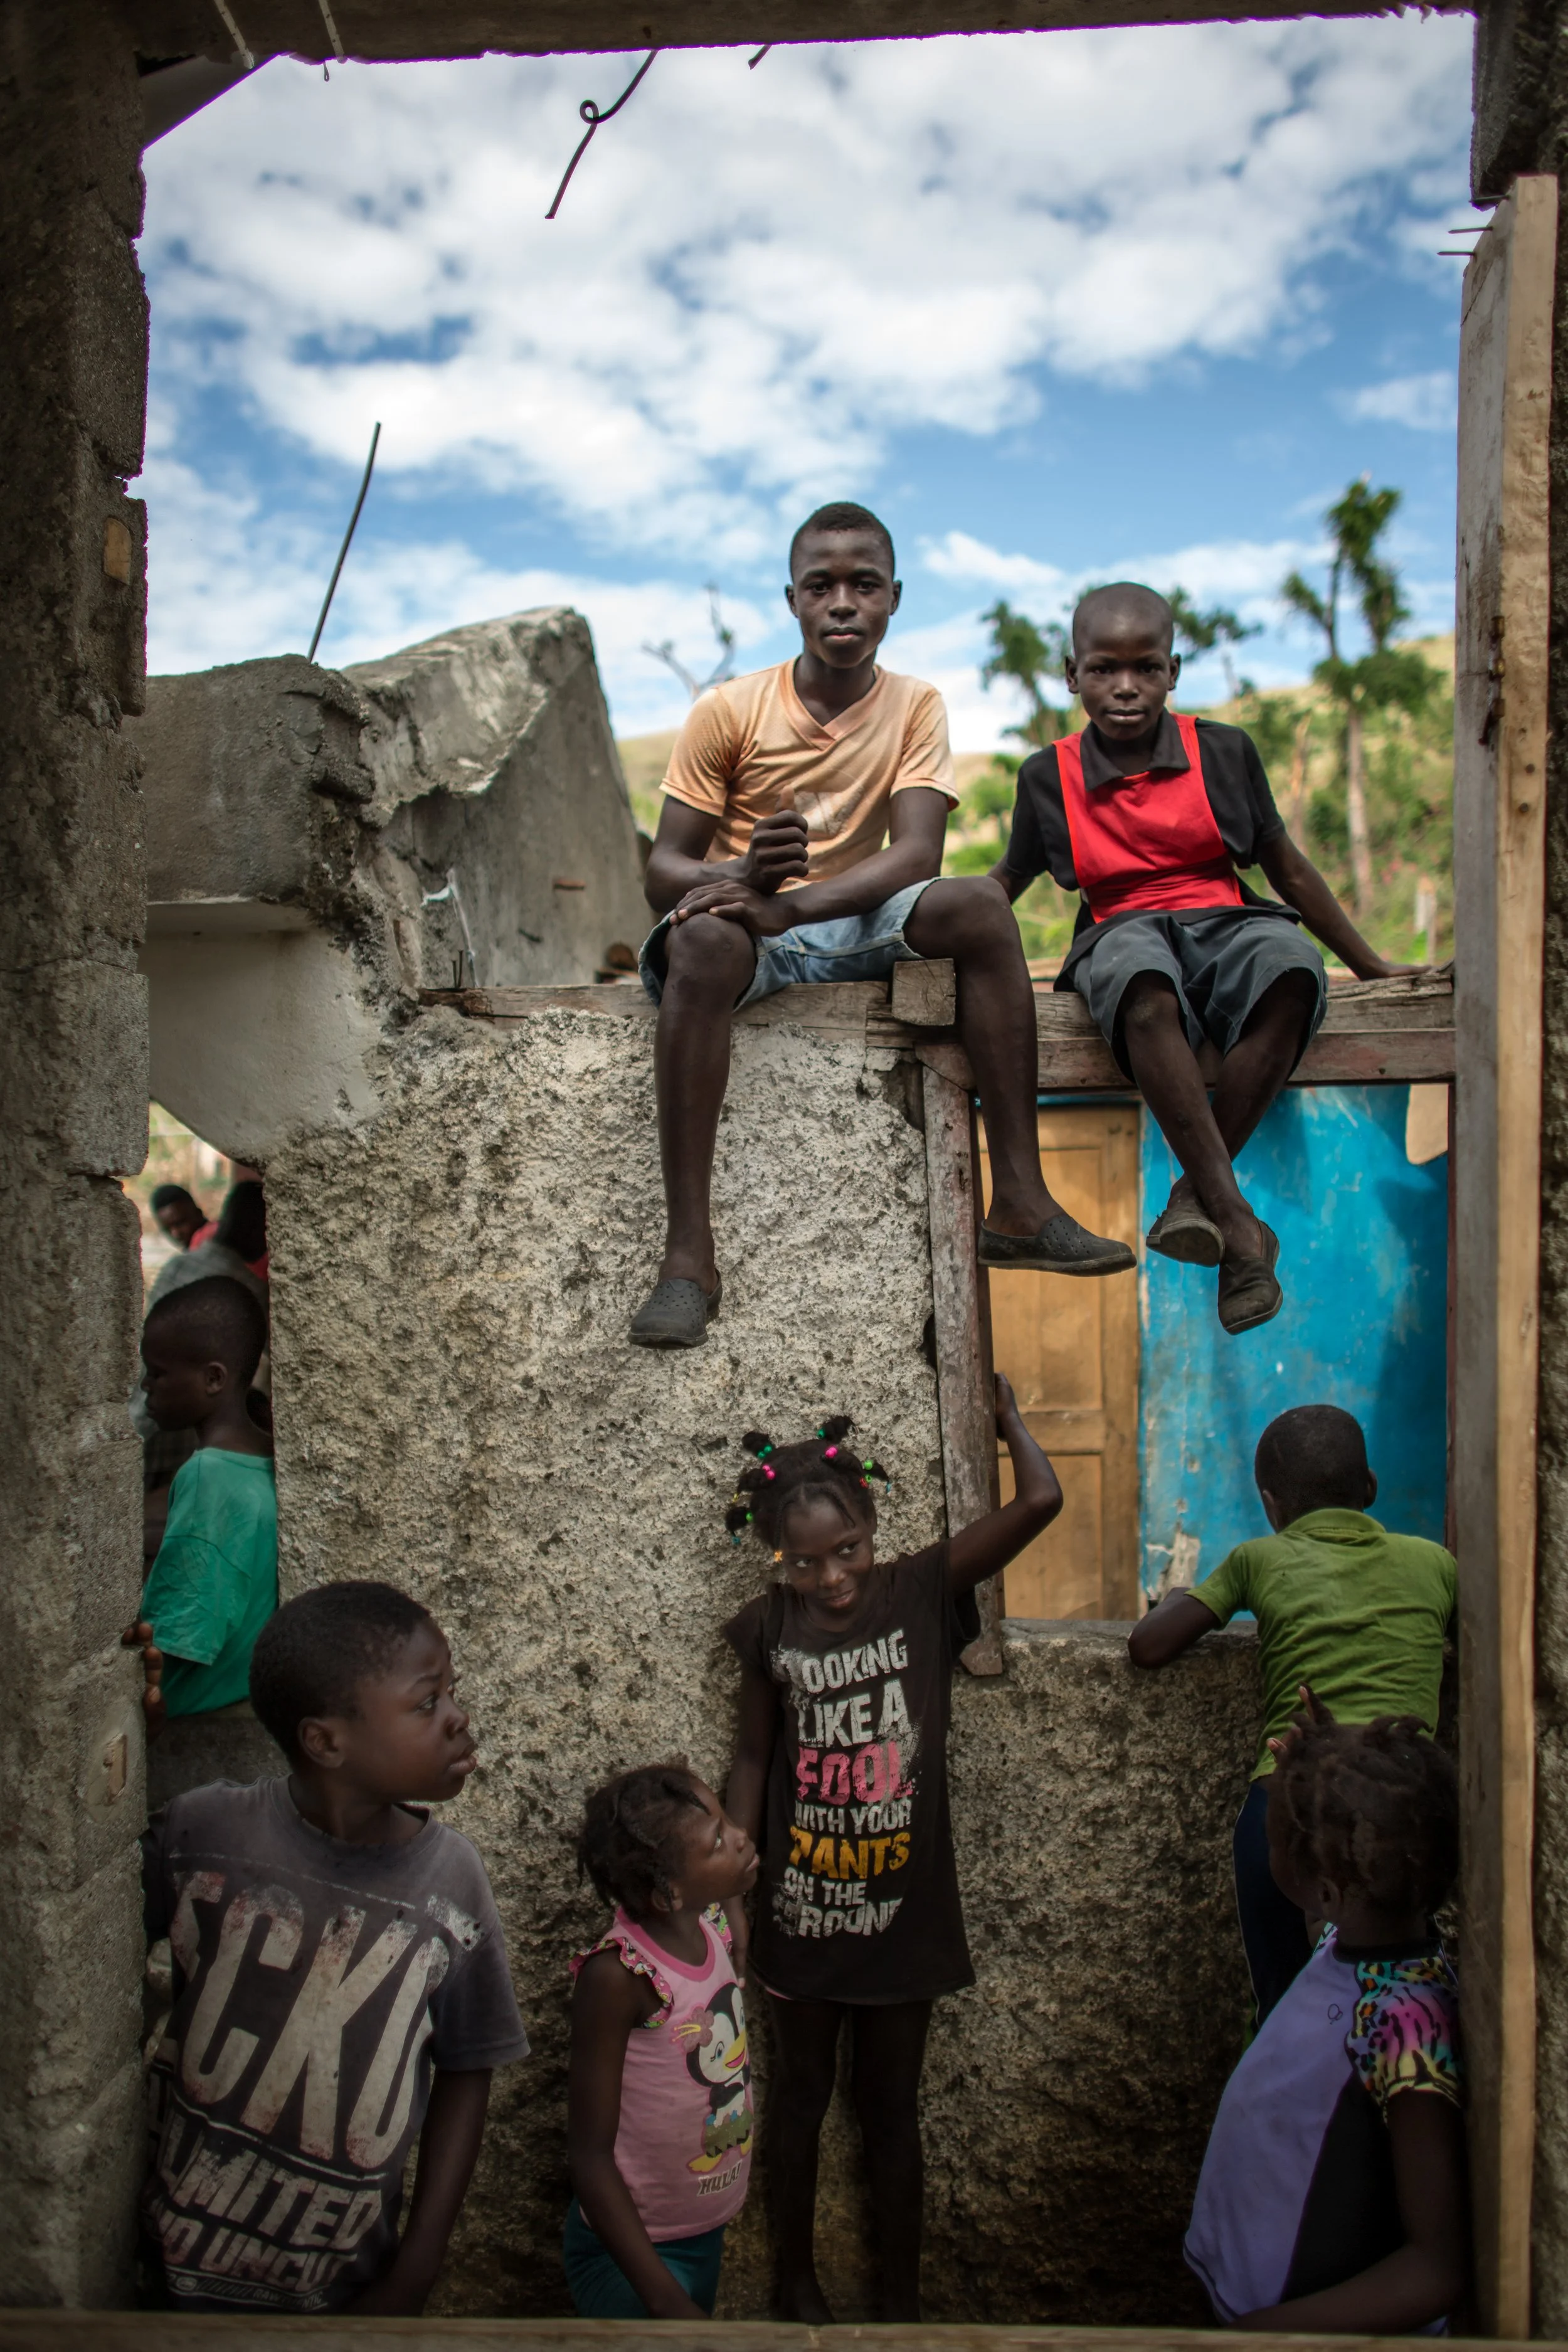
Some photos are best shot vertically.
Photo: © Marko Kokic/Canadian Red Cross
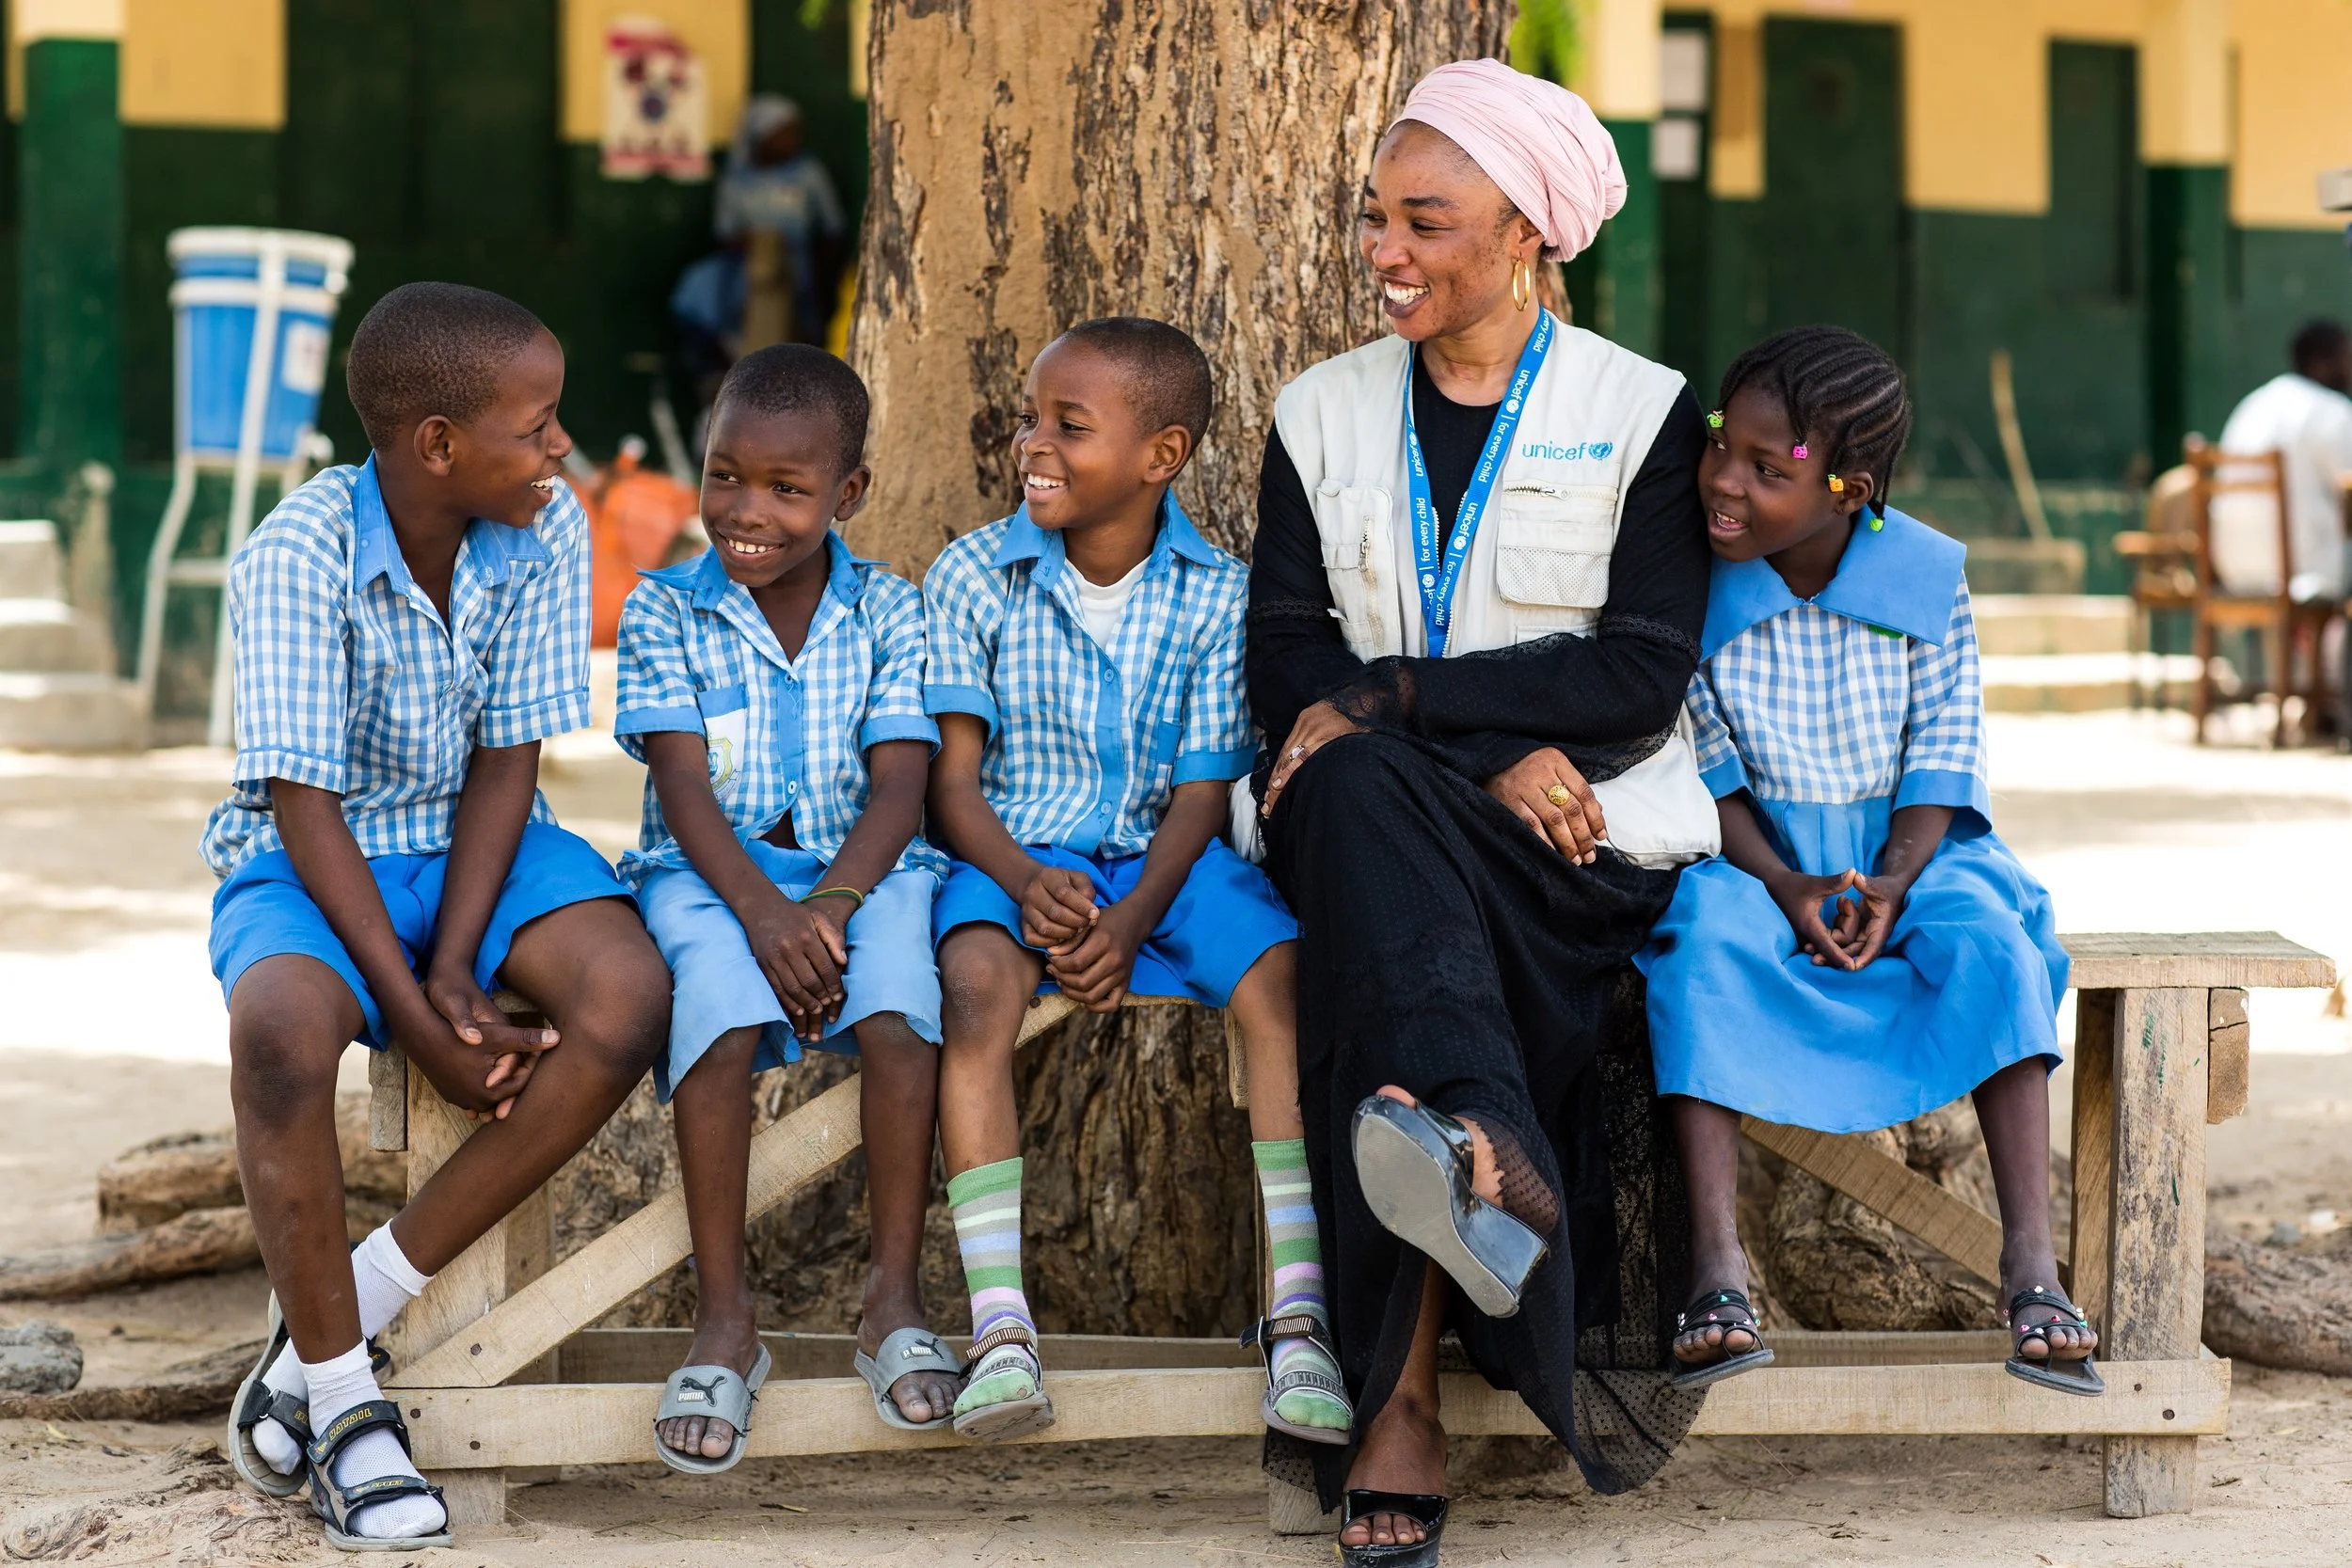
Other photos are best shot horizontally.
Photo: © Marko Kokic/UNICEF, Nigeria 2019
Don’t hold the smartphone in the vertical position for all photographs just because it is easier to grip the device.
Adjust your composition to fill the frame with your subjects, minimizing distracting background or unnecessary empty space.
There are many exceptions to photographic “rules” of composition, but generally speaking:
When creating a posed photo of one or two people, it is usually best to compose the photo vertically, in portrait mode.
When creating a posed photo of four or more people, it is usually best to compose the photo horizontally, in landscape mode. Photographing these larger groups in vertical format will usually result in partially cropping out the people on the sides of the group and leaving empty space on the top of the photo.
When possible, photograph subjects in both vertical and horizontal formats, adjusting the distance between them and the camera to fill the frame while leaving a sufficient border.
Finally, be aware that Instagram and Facebook have mixed format features that allow you to combine portrait, landscape and square photos in a single post.
Follow the Same Rules for Video
For video, follow the same rules of lighting and composition described above.
Most importantly, hold the camera steady. If walking with or panning the camera, do so slowly and smoothly.
For more video tips, including the use of an external mic, see our article here: What Nonprofits Need to Know About Video.
Learn These Basic Editing Techniques
The most common edits regularly performed by professional photographers include adjustments to:
lighting (such as raising the overall exposure or the brightness of the shadows),
cropping (reframing the image), and
color (to adjust the white balance so that the white objects in your photos look white and other colors look natural).
All of these edits can be performed on a smartphone, as illustrated in the video below.
As a first step to editing, press the auto edit button (shown as a magic wand on the above iPhone screen) to see what improvements can be made quickly, and remember that it is easy to undo any edits that you do make.
Clean Your Camera Lenses Before Each Use
If you follow only one tip, make it this one.
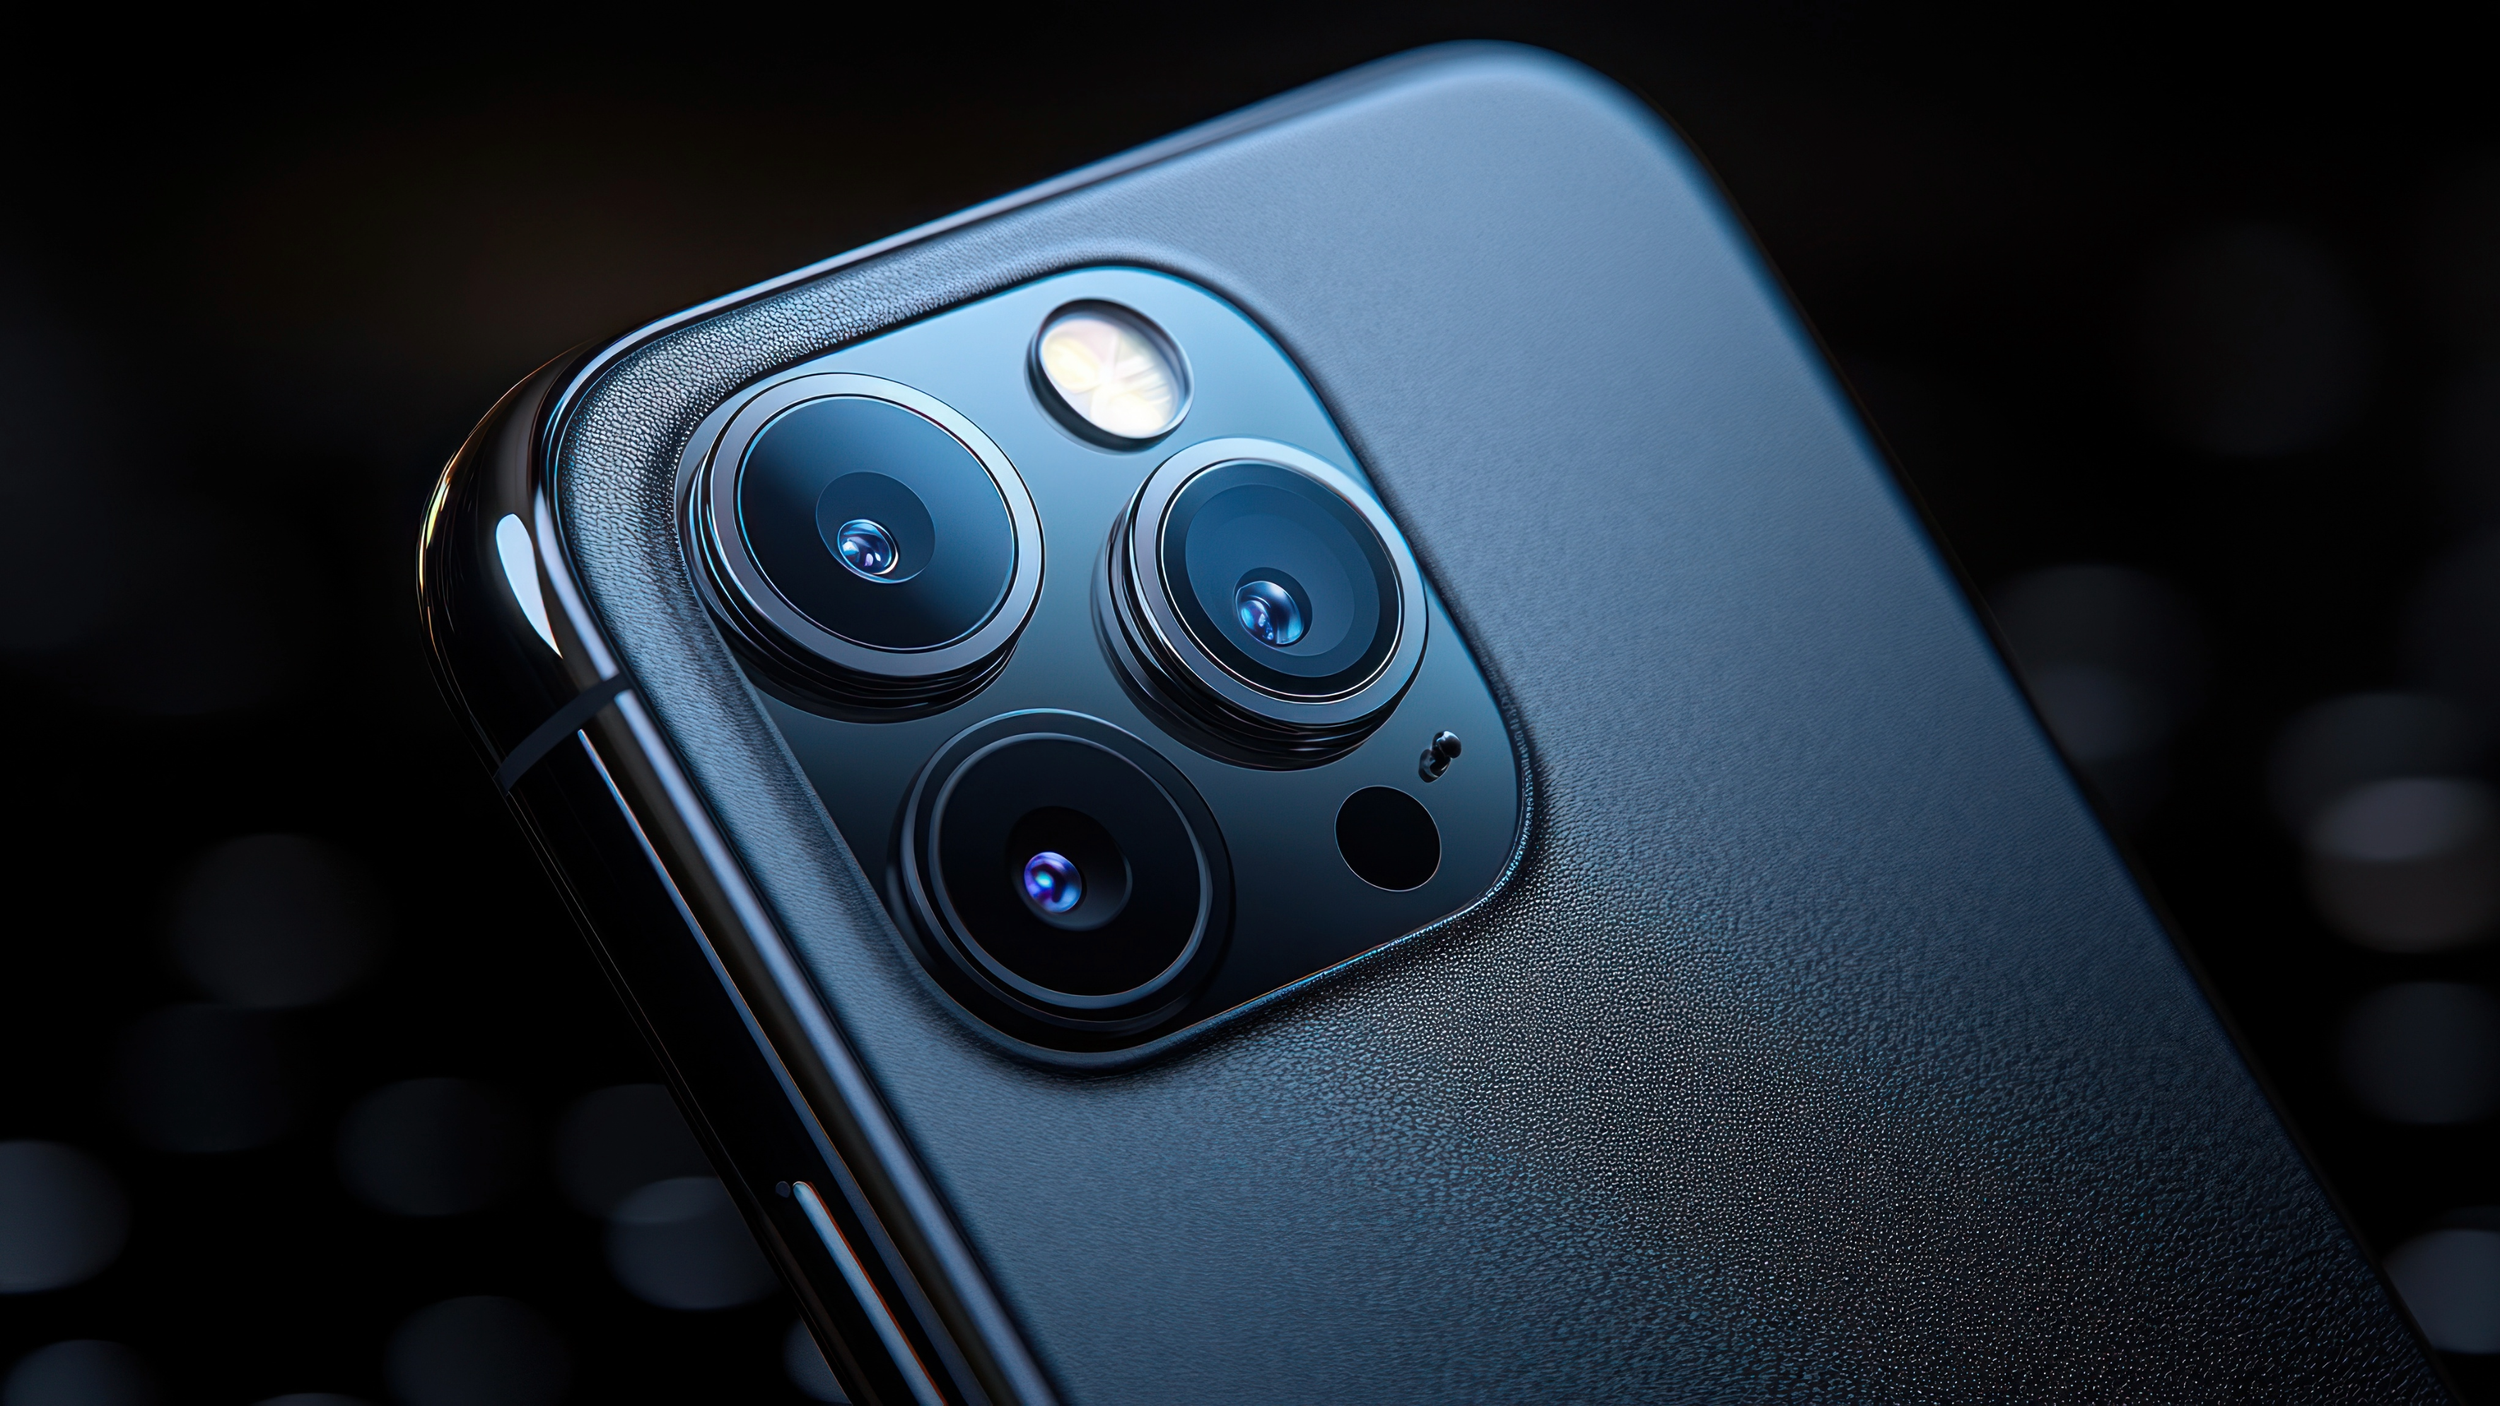
Use a soft, clean cloth to wipe each of the lenses on your smartphone. A barely visible smudged fingerprint on your lens can add a layer of fog that unnecessarily detracts from your images.
For more on photography for nonprofits, see our article here: Five Nonprofit Photography Best Practices.
About Us
We are a New York-based photography services company specializing in crafting visual narratives for nonprofits and nongovernmental organizations (NGOs).
Our expertise:
Documentary-style photography and videography
Drone photography and videography
Disaster response photography
Visual campaigns for fundraising and advocacy
Event photography and videography
Headshots and environmental portraits